Skip to product information
1 of 6

RedPrinting.com

Premium Magnetic Squeegee with Suede Edge, Bubble-Free Sticker & Decal Application Tool

Premium Magnetic Squeegee with Suede Edge, Bubble-Free Sticker & Decal Application Tool

Quantity

Only for reprinting the exact same design.For any changes, leave this blank and upload your new file. Even if you enter your reorder number, please upload your design file so we can confirm your order.

Regular price $5.00
Regular price Sale price $5.00
Sale Sold out
View full details
Application Tools

Premium Magnetic Squeegee
with Suede Edge

Apply stickers and decals bubble-free with our premium magnetic squeegee. Featuring a soft faux suede edge that won't scratch surfaces and built-in neodymium magnets for hands-free holding — the essential tool for clean, professional application every time.

Magnetic Squeegees
🧲
Neodymium Magnets
2 Built-in Magnets
🦌
Faux Suede Edge
Scratch-Free Application
📐
3.9" × 2.9"
Ergonomic Size
💪
Heavy-Duty Build
Long-Lasting Durability

Why Choose This Magnetic Squeegee?

Built for professional, scratch-free application.

01
Faux Suede Edge – Scratch-Free Application
The soft faux deer suede lining on the magnetic squeegee edge glides smoothly across surfaces without leaving scratches or marks. Ideal for vinyl stickers, decals, window tint, paint protection film, and any surface where you need a clean, damage-free finish.
02
Built-In Neodymium Magnets
Two powerful neodymium magnets are embedded inside the squeegee body, allowing you to attach it to any metal surface for convenient hands-free storage. Even better, use the magnets to temporarily hold your vinyl or decal in place while you work — no extra hands needed.
03
Premium Rigid Plastic Body
Made from firm yet flexible high-quality plastic that provides the perfect balance of rigidity and control. Firm enough to push out air bubbles effectively, flexible enough to conform to curved surfaces.
04
Exceptional Durability
Built to last through hundreds of applications. The suede edge maintains its softness over time and the plastic body resists cracking and warping, giving you a reliable tool you can count on project after project.

Pricing

Save more when you buy in bulk.

Premium Magnetic Squeegee
Quantity Price Per Squeegee Savings
1 $5.00 $5.00 / ea —
4 Popular $15.99 $4.00 / ea Save 20%
10 $29.99 $3.00 / ea Save 40%

Product Specifications

All the details at a glance.

Size
3.9" × 2.9"
Body Material
Premium Rigid Plastic
Edge Material
Faux Deer Suede
Magnets
2× Neodymium Magnets
Color
Black / Orange
Weight
Lightweight

Perfect For

The go-to tool for any application job.

🏷️ Vinyl Sticker Application 🪟 Window Tint Installation 🚗 Vehicle Decals & Wraps 🛡️ Paint Protection Film (PPF) 📦 Shipping Label Smoothing 🪧 Wall Decal Installation 🏪 Storefront Window Graphics 💻 Laptop & Device Skins

How to Use

Bubble-free application in 3 easy steps.

1
Position
Align your sticker or decal on the surface. Use the built-in magnets to temporarily hold it in place on metal surfaces.
2
Squeegee
Starting from the center, press firmly and push outward with the suede edge to remove air bubbles.
3
Finish
Work from top to bottom for large decals. The suede edge ensures a smooth, scratch-free finish every time.

At a Glance

Everything you need to know.

  • Faux Suede Edge – Soft deer suede lining for scratch-free, smooth application
  • 2× Neodymium Magnets – Attach to metal surfaces for hands-free storage and temporary vinyl holding
  • Premium Rigid Plastic – Firm yet flexible body for effective bubble removal on flat and curved surfaces
  • Compact 3.9" × 2.9" Size – Ergonomic design fits comfortably in hand for extended use
  • Exceptional Durability – Built to last through hundreds of applications without wearing out
  • Bulk Discounts Available – Save up to 40% when you order 10 or more

Free Design Templates

Design Templates That Make
Every File Print-Ready

Download free design templates for all RedPrinting products. Each template includes the correct trim size, bleed, and safe margin, so your artwork prints exactly the way you designed it.

📐
Before you start: Download the template for your product and size, then set up your artwork following our Artwork Guidelines. Correct file setup means faster production and no delays.

Sticker Templates

Individually cut stickers in every shape and size, plus multi-design sticker sheets.

⚪Round Stickers
Order Now
Download by Size
⬜Square Stickers
Order Now
Download by Size
🔲Rounded Square Stickers
Order Now
Download by Size
▭Rectangle Stickers
Order Now
Download by Size
▢Rounded Rectangle Stickers
Order Now
Download by Size
⬭Oval Stickers
Order Now
Download by Size
📄Sticker Sheets
Order Now

Business Card Templates

Standard, mini, and square formats for every card design.

💳Business Cards
Order Now

Flyer & Poster Templates

From handout flyers to large-format posters, print-ready at every size.

📰Flyers
Order Now
Download by Size
8.5" × 11" 5.5" × 8.5" 11" × 17"

Artwork Guidelines

Artwork Guidelines That Get
Every File Print-Ready

Every file submitted to RedPrinting is reviewed by a real person before it goes to press. This guide walks you through file formats, resolution, bleed, and cut lines, so your stickers, labels, and cards come out exactly the way you designed them.

👁️
Human File Review
Every Order, No Exceptions
🖨️
Print-Ready Files
We Print What You Send
🔍
300 DPI
Recommended Resolution
📐
0.075" Bleed
1/8" for Large Format

We Print the File You Send

Design services are not offered. We print your artwork as supplied, optimized for press.

We print the file you upload. We don't redesign artwork, edit your text, or build print files from scratch, which is part of how we keep prices low and turnaround fast. What we do is prepare your file for the press: we check the size, bleed, and resolution, and make the technical adjustments needed for a clean print.

If a file cannot be printed as it is, we contact you by text, email, or both and ask for a corrected file. If we don't receive a print-ready file within 3 business days, we cancel the order and issue a full refund.

01
Your file is the wrong size, or has no bleed
We extend the artwork to the correct size ourselves, using the generative AI tools built into Adobe Photoshop, and then print. We do this without pausing your order and without contacting you first. If the artwork cannot be extended cleanly, we stop and ask you for a corrected file.
02
The resolution is lower than 300 DPI
If the printed piece still reads properly, we print it. A file slightly under spec usually looks fine at arm's length. If the resolution is so low that the text cannot be read, we stop and ask for a higher-resolution file.
03
Your artwork was generated by AI
Image generators often produce smeared or malformed letterforms and colors that drift from the prompt. We have no way to tell which of those are mistakes and which are deliberate, so we print the file exactly as you uploaded it.
💡
Want to start at the right size? Download one of our free product templates. Trim, bleed, and safe area are already in place, so all you have to do is drop your design in.

The Three Lines on Every Template

Understand these and your file will cut clean every time.

Sticker artwork template showing bleed line, die line, and safe line
Bleed line (outermost), die line (the finished edge), and safe line (innermost).

Bleed Line: extend artwork to here
The outer boundary, 0.075 inch beyond the finished edge. Any background color, pattern, or image that should reach the edge of your sticker must extend all the way to this line. Bleed absorbs the small shift that happens during cutting, so no white slivers appear along the border. Most printers ask for a full 1/8 inch, but our cutting tolerance is tight enough that 0.075 inch is all we need, which leaves you more usable design space.

Die Line: the finished edge
This is where the blade cuts. The die line defines the actual size and shape of your finished sticker. It's a guide only, so never print the die line itself as part of your artwork.

Safe Line: keep text and logos inside
The inner boundary, 0.075 inch inside the finished edge. Anything you can't afford to lose, including text, logos, QR codes, borders and contact details, belongs entirely inside this area. Elements placed too close to the die line risk being clipped.
⚠️
Watch out for thin borders. A frame or outline that hugs the die line will look uneven if the cut shifts even slightly. Either pull the border well inside the safe area, or let the design bleed off the edge entirely.
📏
Using a template from another printer? Files built with the US standard 1/8 inch bleed work here without any changes. We trim the extra bleed down to 0.075 inch with a clipping mask before printing. Just make sure nothing important sits outside the safe area.
🪧
Large-format products use a 1/8 inch bleed. Banners, A-frame signs, X-banners, car magnets, car wraps, window decals, and other large-format products have a wider cutting tolerance, so their files need the US standard 1/8 inch bleed instead of 0.075 inch. Keep text and logos at least 1/8 inch inside the finished edge as well.

Accepted File Formats

Vector files give the sharpest results, but we accept high-resolution raster files too.

Format Type Best For Recommended
AI Vector Logos, text, line art, custom shapes Best
PDF Vector Print-ready files with fonts outlined Best
EPS Vector Legacy vector artwork Best
PSD Raster Layered photo-based designs Good
PNG Raster Designs needing a transparent background Good
JPG Raster Photographs and full-color images Good
TIFF Raster High-quality scanned or photo artwork Good
Accepted artwork file formats for RedPrinting
  • Outline your fonts: Convert all text to outlines or curves so typefaces render correctly on our end.
  • Use CMYK color mode: Printing is a CMYK process. RGB files are converted automatically, and bright neon or vivid blues may shift slightly.
  • Flatten transparency: Complex transparency and drop shadows can behave unpredictably; flatten them before exporting.
  • Embed or attach linked images: Missing links are the most common reason a file gets sent back.

Image Resolution

300 DPI at final print size is the target.

Resolution is measured at the size the artwork will actually be printed. A 300 DPI image looks crisp on a 2-inch sticker but turns soft when stretched across a 24-inch poster. Always check the pixel dimensions against the finished size, not against how the file looks on screen.

Web images pulled from a website or social media are usually 72 DPI, which is roughly a quarter of the detail we need. Enlarging a low-resolution file doesn't add detail back. It only makes the softness more visible.

Low-resolution artwork? If your piece still reads clearly in print, we print it. If the text would be unreadable, we contact you and ask for a higher-resolution file.

Comparison of image resolutions at 72 DPI and 300 DPI
The same artwork at low and high resolution.
🔎
Quick check: Multiply the finished size in inches by 300. A 3" × 2" sticker needs an image of roughly 900 × 600 pixels or larger.

Choosing Your Material

Where the sticker will live decides which stock to use.

💧 Vinyl Stickers
Built for the outdoors.
  • Waterproof and tear-resistant
  • Resists fading from sun and weather
  • Holds up on bottles, laptops, and cars
  • Higher cost per sticker
Choose vinyl if the sticker will face water, sunlight, handling, or outdoor conditions.
📦 Paper Stickers
The economical indoor choice.
  • Thin, smooth, and easy to write on
  • Noticeably lower cost per sticker
  • Ideal for packaging, boxes, and mailers
  • Not water- or weather-resistant
Choose paper if the sticker stays indoors: product labels, packaging seals, or promotional use.
🪟 Clear Stickers
Transparent vinyl that lets the surface show through.

Clear stickers are printed on transparent vinyl, so the surface underneath becomes part of the design. They're waterproof, tear-resistant, and work beautifully on glass bottles, cups, laptops, and windows where a white sticker edge would look out of place.

Because there's no white backing, light colors and white ink behave differently than they do on paper. Designs with bold shapes, dark colors, or deliberate negative space tend to read best.

🎯
Still deciding? Think about where the sticker ends up. Anything that gets wet, handled often, or lives outside should be vinyl. Everything else can be paper.

Setting Up Sticker Sheets

Multiple designs and sizes on a single sheet.

Sticker sheets let you print several different designs together on one backing sheet. Our sheet templates come pre-populated with placeholder artwork that you replace with your own files.
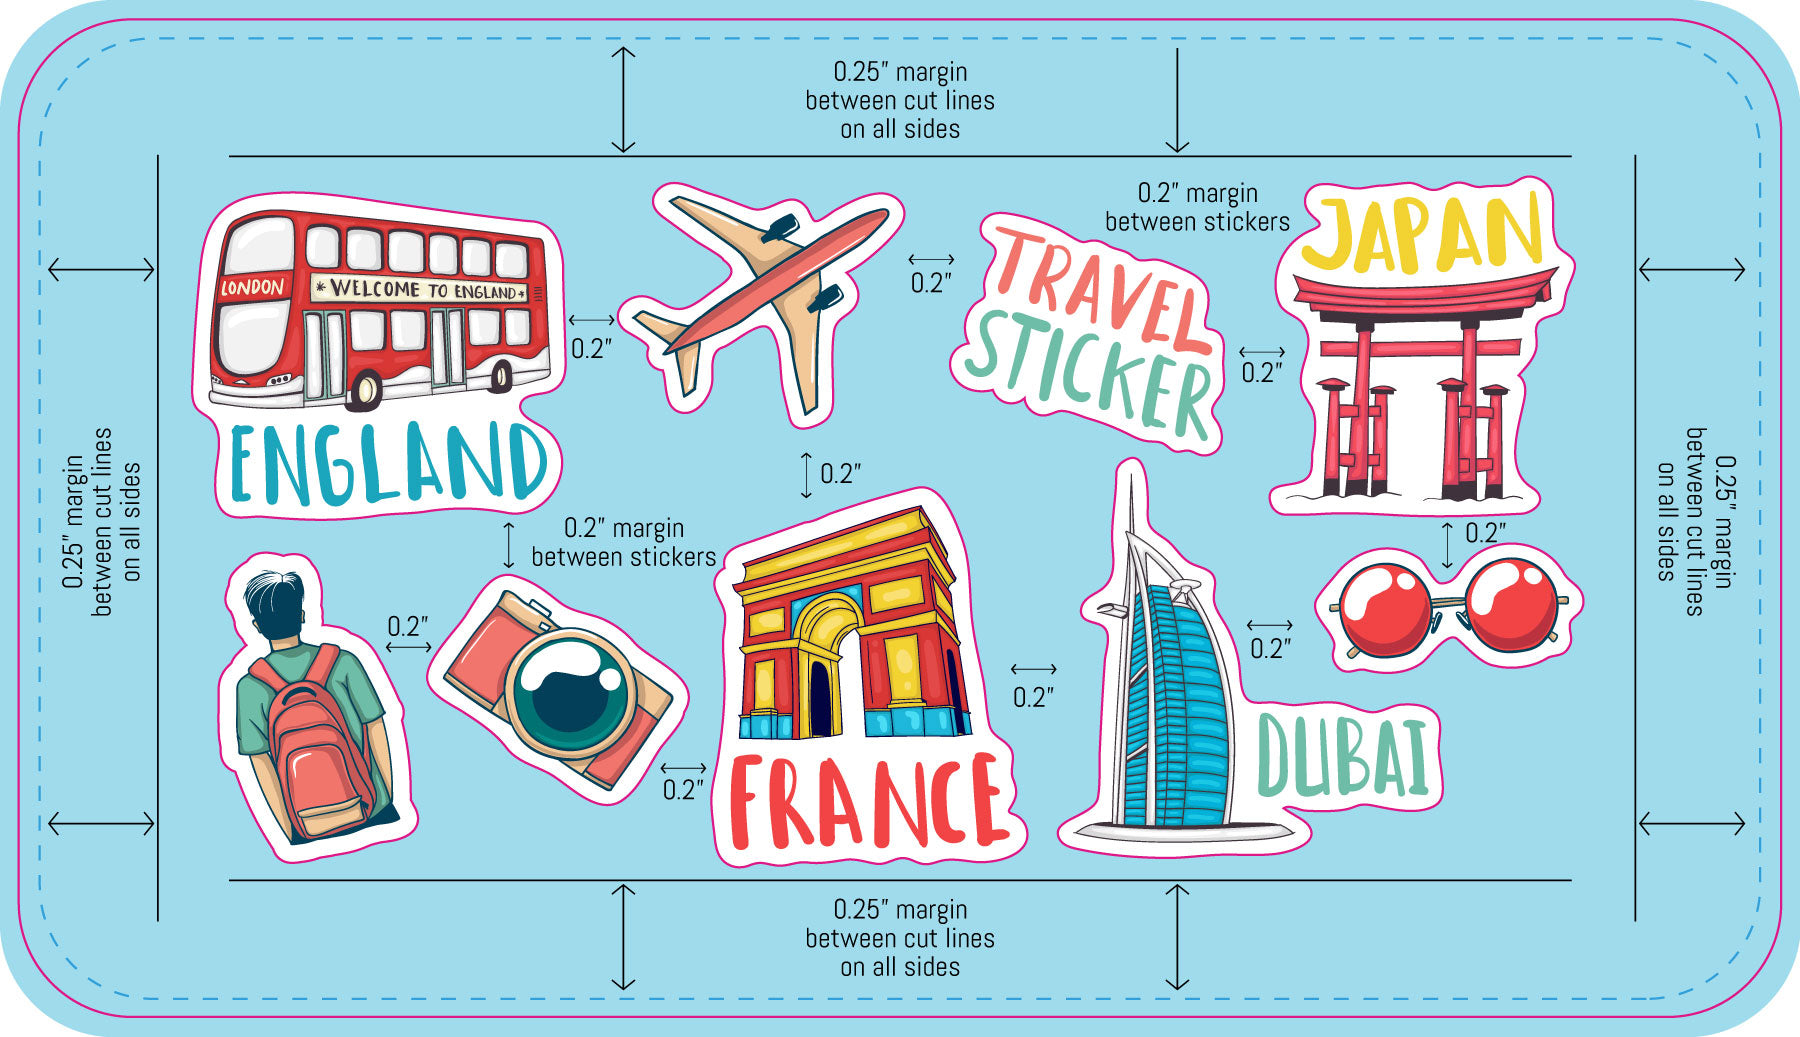
01
Create each design as its own file
Build every individual sticker separately and save each one as a PDF. Each file should already include its own bleed and safe area.
02
Open the sticker sheet template
Download the sheet template that matches your ordered size and open it in Illustrator.
03
Choose Replace at the prompt
A dialog will appear asking whether to Ignore, Replace, or Cancel. Check "Apply to all," then click Replace.
04
Select your PDF artwork
Point the dialog to your individual sticker PDF. The placeholder is swapped out and your design fills the position on the sheet.
05
Review and save
Confirm each design sits inside its own cut line with nothing overlapping, then save the finished sheet as a PDF and upload it with your order.
Sticker sheet artwork setup guideline

Common Mistakes to Avoid

The issues that most often send a file back for revision.

  • No bleed on the background: Artwork that stops at the die line leaves white edges when the cut shifts. Extend it 0.075 inch past the finished edge, or 1/8 inch for large-format products.
  • Text too close to the edge: Anything outside the safe area can be trimmed off. Pull text and logos at least 0.075 inch inside the die line, or 1/8 inch for large-format products.
  • Low-resolution images: Artwork saved from a website prints soft and pixelated. Work from the original high-resolution file whenever possible.
  • Live fonts not outlined: Fonts we don't have installed get substituted. Convert all type to outlines before exporting.
  • RGB color mode: Vivid RGB colors can't always be matched in CMYK. Design in CMYK to see accurate colors from the start.
  • Die line left in the artwork: The cut line is a guide, not a design element. Remove it or keep it on its own separate layer.
  • Wrong template size: Make sure the template you downloaded matches the size you actually ordered.

From File to Finished Print

What happens after you place your order.

1
Upload
Send your print-ready artwork with your order.
2
We Check
We review size, bleed, and resolution.
3
We Optimize
We adjust size and bleed for press when we can.
4
We Contact You
Only if a file can't be printed as it is.
5
We Print
Your order goes to press and ships out.
Ready to Set Up Your File?
Start from a free template with bleed and safe area already in place.