


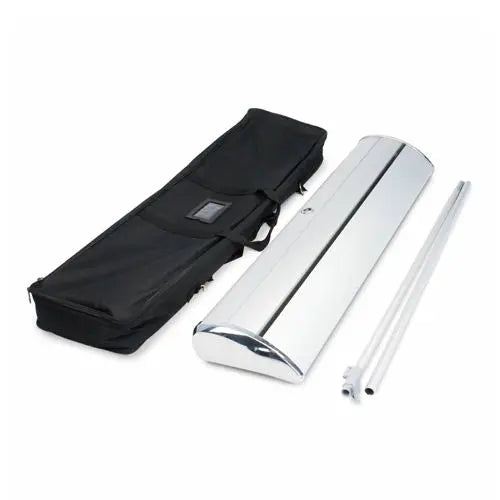
Custom Retractable Banner
With Wide-Base Aluminum Stand
A full-height custom retractable banner that pulls up in seconds and packs into a carry bag, sold as a complete set or as a replacement graphic. The graphic is 13.4 mil PET film, not PVC scrim, so it hangs flat and holds fine detail, and the retractable banner stand is new this year: a wide, flat aluminum base at the same price. An indoor display for showrooms, trade show booths, and lobbies.

Why Choose Our Custom Retractable Banner?
A full-height indoor display, printed and finished in house.
The Complete Set Is $69.99
13.4 mil PET Film, Not Scrim or Thin PP
A Wide Base That Does Not Rock
Printed at 8 Pass on Epson's Newest Press
A Trade Show Banner Stand You Can Fly With
Buy Only the Part You Need
Roll Up Banner Printing Prices
The complete set, the stand on its own, or just the print.
| What You Order | Price |
|---|---|
| Banner & Stand Combo PopularStand + print + bag | $69.99 |
| Stand OnlyWide-base stand + bag | $49.99 |
| Banner (Print) OnlyPET graphic, no stand | $30.00 |
Prices exclude tax, and lamination is free in either finish.
- Print only is $30.00, for refreshing the artwork on a retractable banner stand you already own. Check that yours takes an 85 cm graphic.
- Production is 2 to 3 business days, and transit time is on top of that. See our shipping information for delivery times.
- Working to an event date? Call us at +1 (818) 213-5871 before ordering and we will tell you honestly whether it is achievable.
The Upgraded Retractable Banner Stand
We replaced the stand this year. Twice the weight, a wide aluminum base, and the same price.
The old retractable banner stand balanced on two thin aluminum plates that twisted out from under the cassette, and a 79 inch panel on two narrow strips rocked front to back whenever someone brushed past it. The new one has a wide, flat aluminum base built into the cassette, so there is nothing to swing out and nothing to forget. It is about twice the weight and twice the packed bulk, and that is the point: the mass sits low and spread across a broad footprint, so the stand holds square on its own on a hard floor, on carpet, and in a busy booth.

| Previous Stand | Upgraded Stand | |
|---|---|---|
| Base | Two thin twist-out plates | One wide, flat aluminum base |
| Stability | Rocked front to back | Holds square on its own |
| Weight | Lighter | About 2x heavier |
| Packed Bulk | Smaller | About 2x larger |
| Body | Aluminum | Aluminum, plastic side caps |
| Price | $69.99 set | $69.99 set |

An all-aluminum stand with a wide base that does not rock, where most stands at this price are plastic-bodied or balanced on twist-out feet, and a 13.4 mil PET graphic printed at 8 pass. Everything is printed and finished at our own shop in Chatsworth, so this is banner printing in Los Angeles rather than a listing that forwards your file somewhere else. If you find better at $69.99, we would like to see it.
13.4 mil PET Film, Printed at 8 Pass
Thicker film than standard roll-up stock.
| PET Film | 240 microns (9.4 mil) |
| Lamination | 100 microns (3.9 mil), glossy or matte, no extra cost |
| Finished Graphic | 340 microns (13.4 mil) |
| Print Quality | 8-pass premium mode on every banner |
| Press | 11-color EPSON SureColor S9170, plus a 10-color S80600L |

How many passes? Four is fast and cheap, and it shows. We print at 8.
What material, how thick? Ask for the number in mil or microns; plenty of shops print roll-ups on thin PP and never say so.
Why This Vertical Banner Stand Is Indoor Only
Read this before you order: this display is not made to stand outside.
A vertical banner stand like this one is an indoor display. The base is a light aluminum cassette with no ballast and nothing anchoring it to the ground. The wide base makes it steady on a floor; it does not make it steady in wind. Outside, a 33.5 inch wide panel behaves like a sail, and moisture that gets into the cassette does not come back out.
- Where a full-height display earns its keep. At 79 inches it is read from across a room, so it belongs where there is floor space: trade show booth backdrops, showroom corners, exhibition halls, lobbies, and registration desks.
File Setup Guide for 33.5" × 79" Banners
Print-ready artwork only.
| Display Size | 33.5" × 79" (85 × 200 cm) |
| Bleed | 1/8" (0.125") per side |
| Safe Area | 1/8" inside the trim on every side |
| Color Mode | RGB or CMYK. RGB is the better choice on this press |
| Artwork | Vector preferred (AI, PDF, SVG); raster at 300 DPI or higher |
| Fonts | All fonts outlined before saving, including PDFs |
| Effects & Transparency | Rasterize all transparency, shadows, and effects |
| Accepted Formats | PDF, AI, SVG, JPG, PNG |
How to Order a Trade Show Banner Stand
From upload to display in 4 steps.
Retractable and Roll Up Banner FAQ
The stand, the film, printing, and ordering.
Is this a retractable banner or a roll up banner?
The same product. Retractable banner is the usual US term; roll up banner, pull up banner, and vertical banner stand all mean the same thing, and a trade show banner stand is this product doing that job.
What size is the retractable banner?
The display size is 33.5" × 79", which is 85 × 200 cm, the standard US size. The printed sheet runs taller than the visible area, so contact us for the template first.
What is the difference between the combo, stand only, and print only?
Combo at $69.99 is the stand, your printed graphic, and the carry bag. Stand Only is $49.99, Print Only $30.00. Separately that is $79.99, so the combo saves $10.00.
Should I pick glossy or matte lamination?
Glossy deepens color and suits photography. Matte is glare-free, which keeps text and QR codes readable under spotlights or beside a window. Both are 100 microns and both are free.
Do I need to convert my artwork to CMYK?
No. RGB is the better choice here. Our 11-color press has dedicated orange, red, and green inks, so it reproduces colors outside the CMYK gamut entirely and converting first throws those away. CMYK is still accepted.
What if my retractable banner arrives damaged?
Take a photo and send it to us through web chat, and we will reprint and reship your order as quickly as possible.
Design Templates That Make
Every File Print-Ready
Download free design templates for all RedPrinting products. Each template includes the correct trim size, bleed, and safe margin, so your artwork prints exactly the way you designed it.
Sticker Templates
Individually cut stickers in every shape and size, plus multi-design sticker sheets.
Business Card Templates
Standard, mini, and square formats for every card design.
Artwork Guidelines That Get
Every File Print-Ready
Every file submitted to RedPrinting is reviewed by a real person before it goes to press. This guide walks you through file formats, resolution, bleed, and cut lines, so your stickers, labels, and cards come out exactly the way you designed them.
We Print the File You Send
Design services are not offered. We print your artwork as supplied, optimized for press.
We print the file you upload. We don't redesign artwork, edit your text, or build print files from scratch, which is part of how we keep prices low and turnaround fast. What we do is prepare your file for the press: we check the size, bleed, and resolution, and make the technical adjustments needed for a clean print.
If a file cannot be printed as it is, we contact you by text, email, or both and ask for a corrected file. If we don't receive a print-ready file within 3 business days, we cancel the order and issue a full refund.
The Three Lines on Every Template
Understand these and your file will cut clean every time.

Accepted File Formats
Vector files give the sharpest results, but we accept high-resolution raster files too.
| Format | Type | Best For | Recommended |
|---|---|---|---|
| AI | Vector | Logos, text, line art, custom shapes | Best |
| Vector | Print-ready files with fonts outlined | Best | |
| EPS | Vector | Legacy vector artwork | Best |
| PSD | Raster | Layered photo-based designs | Good |
| PNG | Raster | Designs needing a transparent background | Good |
| JPG | Raster | Photographs and full-color images | Good |
| TIFF | Raster | High-quality scanned or photo artwork | Good |

- Outline your fonts: Convert all text to outlines or curves so typefaces render correctly on our end.
- Use CMYK color mode: Printing is a CMYK process. RGB files are converted automatically, and bright neon or vivid blues may shift slightly.
- Flatten transparency: Complex transparency and drop shadows can behave unpredictably; flatten them before exporting.
- Embed or attach linked images: Missing links are the most common reason a file gets sent back.
Image Resolution
300 DPI at final print size is the target.
Resolution is measured at the size the artwork will actually be printed. A 300 DPI image looks crisp on a 2-inch sticker but turns soft when stretched across a 24-inch poster. Always check the pixel dimensions against the finished size, not against how the file looks on screen.
Web images pulled from a website or social media are usually 72 DPI, which is roughly a quarter of the detail we need. Enlarging a low-resolution file doesn't add detail back. It only makes the softness more visible.
Low-resolution artwork? If your piece still reads clearly in print, we print it. If the text would be unreadable, we contact you and ask for a higher-resolution file.

Choosing Your Material
Where the sticker will live decides which stock to use.
- Waterproof and tear-resistant
- Resists fading from sun and weather
- Holds up on bottles, laptops, and cars
- Higher cost per sticker
- Thin, smooth, and easy to write on
- Noticeably lower cost per sticker
- Ideal for packaging, boxes, and mailers
- Not water- or weather-resistant
Clear stickers are printed on transparent vinyl, so the surface underneath becomes part of the design. They're waterproof, tear-resistant, and work beautifully on glass bottles, cups, laptops, and windows where a white sticker edge would look out of place.
Because there's no white backing, light colors and white ink behave differently than they do on paper. Designs with bold shapes, dark colors, or deliberate negative space tend to read best.
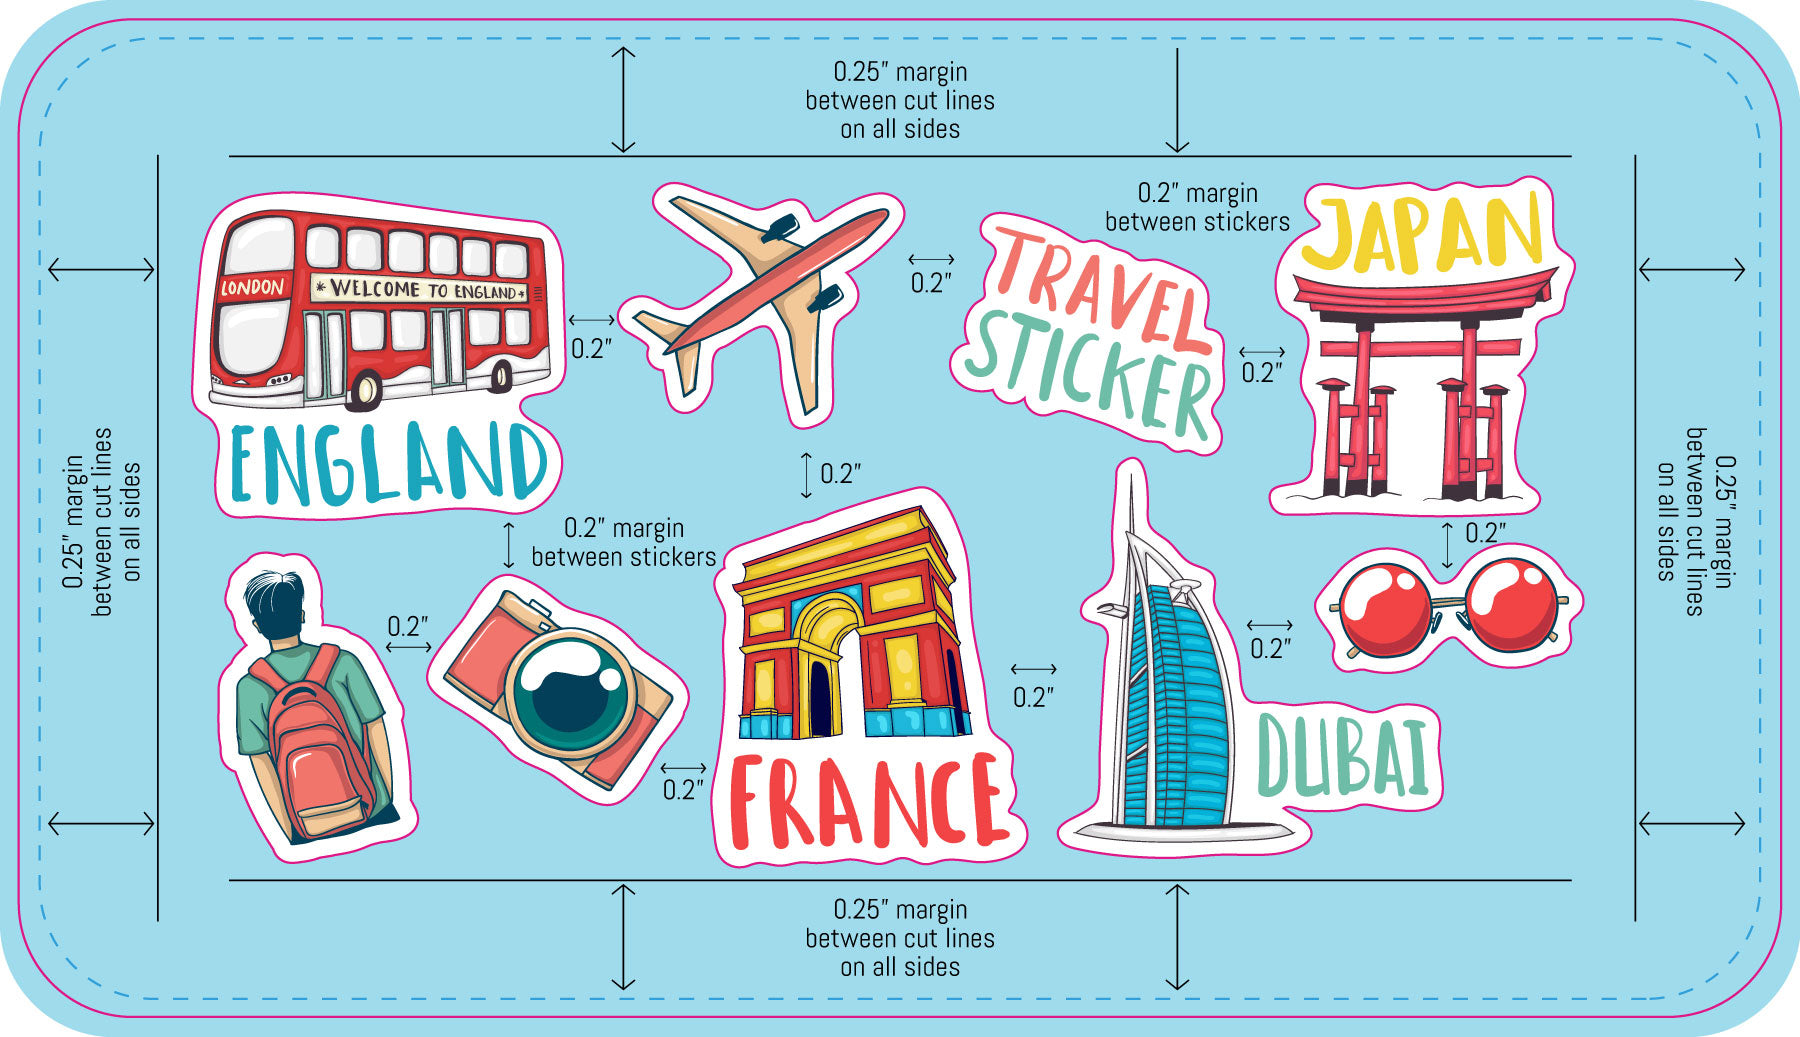
Setting Up Sticker Sheets
Multiple designs and sizes on a single sheet.
Sticker sheets let you print several different designs together on one backing sheet. Our sheet templates come pre-populated with placeholder artwork that you replace with your own files.
Common Mistakes to Avoid
The issues that most often send a file back for revision.
- No bleed on the background: Artwork that stops at the die line leaves white edges when the cut shifts. Extend it 0.075 inch past the finished edge, or 1/8 inch for large-format products.
- Text too close to the edge: Anything outside the safe area can be trimmed off. Pull text and logos at least 0.075 inch inside the die line, or 1/8 inch for large-format products.
- Low-resolution images: Artwork saved from a website prints soft and pixelated. Work from the original high-resolution file whenever possible.
- Live fonts not outlined: Fonts we don't have installed get substituted. Convert all type to outlines before exporting.
- RGB color mode: Vivid RGB colors can't always be matched in CMYK. Design in CMYK to see accurate colors from the start.
- Die line left in the artwork: The cut line is a guide, not a design element. Remove it or keep it on its own separate layer.
- Wrong template size: Make sure the template you downloaded matches the size you actually ordered.
From File to Finished Print
What happens after you place your order.